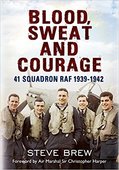
Association blog
 41 Squadron Rested after the Battle of Britain On 23 February 1941, following almost six months deployment in the thick of the action at Hornchurch, 41 Squadron was ordered north to Catterick, in 13 Group, for a rest. It was necessary. Their time at Hornchurch had taken its toll on the unit, and it was now a very different squadron, both physically and psychologically. Most of the pilots who had been sent south from Catterick with the unit the previous September did not return today. Fourteen pilots landed at Catterick at 10:00, but of the original 23 pilots who had arrived at Hornchurch in early September 1940, only four made the return flight: • Remaining – 4: Darling, Ford, Lovell, Mackenzie • WIA/Hospitalised – 4: Bennions, Lock, Usmar, Wallens • Killed – 6: Boyle, Hood, Langley, McAdam, Scott, Webster • Posted – 9: Allison, Boret, Carr-Lewty, Cory, Howitt, Morrogh-Ryan, Piddocke, Ryder, Sayers However, if one also includes all the pilots posted to the Squadron between 3 September 1940 and 23 February 1941, the statistics are much more grim: Angus, Boyle, Chalder, Garvey, Gilders, Hogg, Hood, Langley, Lecky, Lloyd, McAdam, O’Neill, Scott, Walker, and Webster were all dead. Others had been wounded in action, such as Sqn Ldr Robert Lister who had taken over command from Sqn Ldr Hood in September 1940 but had only lasted a week before he was shot down and hospitalised. Bennions, Draper, Lock, Usmar and Wallens were also all still in hospital as the Squadron headed for Catterick and only two returned after they were released. Additionally, Aldous, Aldridge, Allison, H. C. Baker, Bamberger, Boret, Carr-Lewty, Carter, Cory, Howitt, Le Roux, Mileham, Morrogh-Ryan, Norwell, Piddocke, Ryder, and Sayers had all been posted away. Taking all these men into account, a total of 15 pilots had been killed, six wounded and hospitalised, and 17 otherwise posted away, making over a 150% turnover in manpower since the unit’s deployment to Hornchurch in early September 1940. The Squadron now also had its third Commanding Officer since then, and in fact its fourth within ten months [See the table in Appendix I for a clearer overview of personnel movements]. Nominal Roll, 23 February 1941 On their arrival at RAF Catterick, 41 Squadron consisted of the following 22 pilots: Sqn Ldr Donald O. Finlay Sqn Ldr Patrick E. Meagher (Supernumerary) Flt Lt Anthony D. J. Lovell DFC, OC B Flight Flt Lt John N. Mackenzie DFC, OC A Flight Fg Off Dennis A. Adams Fg Off M. Peter Brown Plt Off Edward V. Darling Plt Off Roy C. Ford Plt Off Michael F. Briggs Plt Off Norman M. Brown Plt Off Edward P. Wells Plt Off Archibald L. Winskill Sgt Plt Aubrey C. Baker Sgt Plt Robert A. Beardsley Sgt Plt Norman V. Glew Sgt Plt Terence W. R. Healy Sgt Plt Thomas Hindle Sgt Plt Harry Hopkinson Sgt Plt Jack London Sgt Plt Wilfred Palmer Sgt Plt George W. Swanwick Sgt Plt Thomas W. Willmott The move to Catterick gave Sqn Ldr Donald Finlay a much-needed opportunity to rest his pilots and provided him a five-month window in which to do so. Whilst most men were sent on leave of varying lengths, many were posted away soon after the unit’s arrival, and replaced by pilots from other squadrons or, more often than not, by fresh pilots, albeit inexperienced, who arrived directly from operational training units. As such, by the time the Squadron returned to operations with 11 Group in late July 1941, the unit had undergone yet another major transformation, and nearly all of the old faces were gone. [Excerpt from Steve Brew’s “Blood, Sweat and Courage” (Fonthill, 2014). Sharing permitted, but no reproduction without permission, please.] 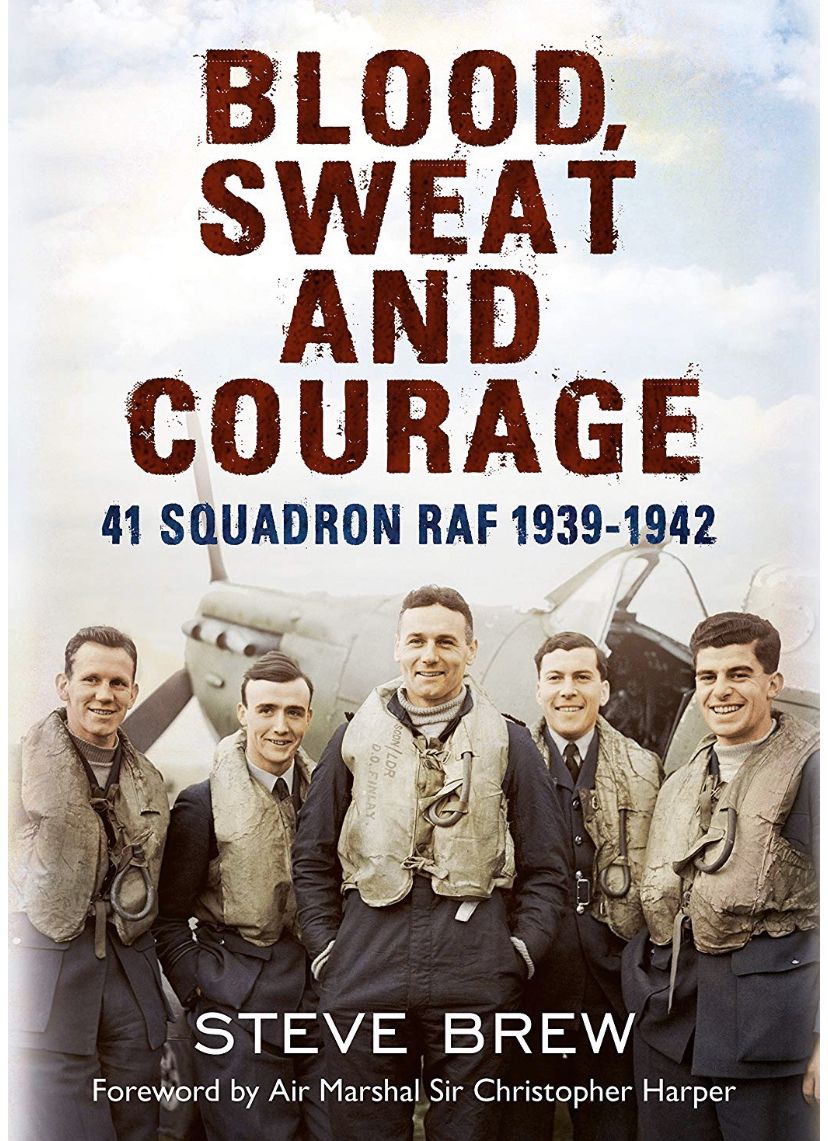
0 Comments
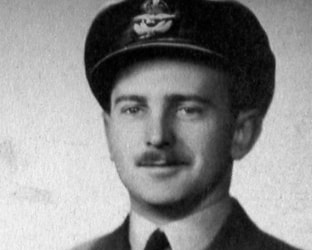
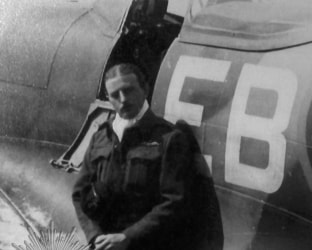
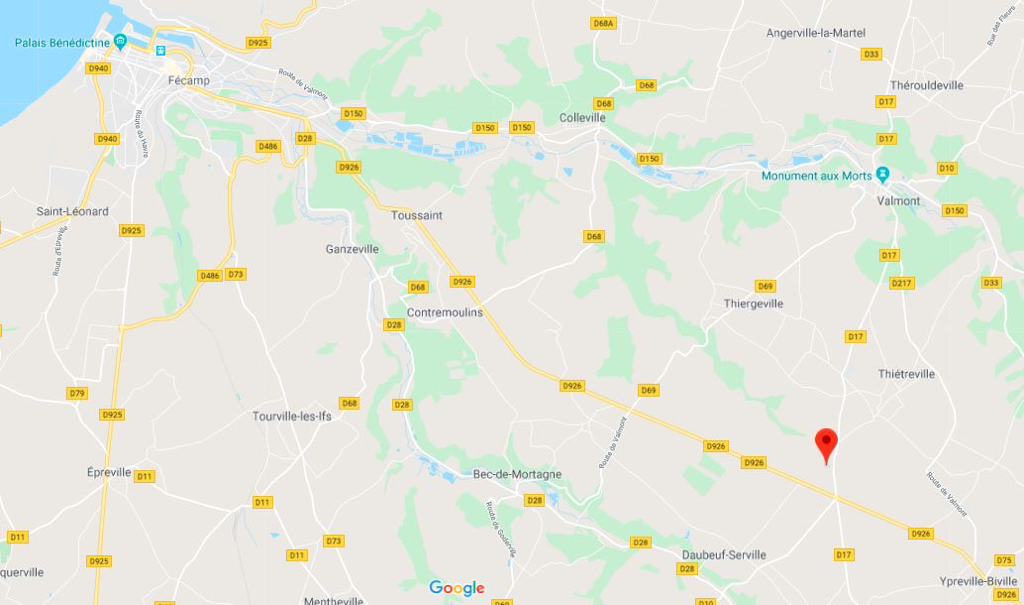 9 December 1941 – A southerly wind of 10-15 mph with 7/10ths cloud at 6,000 feet and 6-8 miles visibility. It was a generally quiet day operationally today, and only two sections of two pilots were airborne. In the first of these, a section undertook an uneventful shipping reconnaissance, 13:25-14:40 (Buckley & Rayner), but it constituted Plt Off John Buckley’s first and in fact only operational sortie with the Squadron. The second was a successful Rhubarb to France by Sgt Plts Arthur Glen (AA902) and Charles Valiquet (W3770). The two pilots were airborne as Blue Section at 14:09 and tasked with attacking ‘Target 57’, a distillery at Le Buc, between Thiétreville and Ypreville, southeast of Fécamp. Traversing the Channel at sea level on a vector of 158° from Merston, the two pilots made landfall in cloud cover at St. Pierre-en-Port, east of Fécamp, and then flew at ground level on a course of about 195° until they reached a tree-lined road between Le Buc and Ypreville. Sighting the distillery about 500 yards to starboard of their position, Glen led Valiquet to the target and they went straight into the attack, first from south to north, Glen strafing the distillery with a two-second burst of cannon and machine-gun fire and Valiquet expending a one-and-a-half-second burst. Both pilots registered strikes but noticed no other effect of their fire. Making a circuit of the target, they repeated their first attack from south to north, both firing and striking the distillery again, but on this occasion eliciting grey-green and ‘reddish’ smoke. They made a full circuit again, and came in a third time from south to north. On this occasion, Glen was unable to position himself correctly for an attack and therefore did not open fire. Following 300 yards behind, Valiquet took his lead and also did not fire. By now, however, “volumes of heavy smoke”(1) were pouring from the top of the distillery. Now trying a new tactic, Glen banked around and made a long run over the fields from north to south, this time opening fire from 300 yards and aiming low. He later reported: “I continued firing until forced to break off to avoid running into the Still. Very concentrated hits were seen at the base of the Still and a terrific sheet of flame enveloped the whole building. I made one or two circuits of the target before leaving and when I came away the whole Still was burning very fiercely with flames issuing from all windows and through the roof. The flames were 200 to 300 feet high.”(2) It is not clear whether Valiquet fired on the fourth run, but he does state in his Combat Report that he took pictures of the target on each of his attacks with his cinegun camera. However, they do not appear to have survived amongst those in the Imperial War Museum’s collection. On the way back out, the pair shot up a moving Army lorry in the same vicinity, but no results of their attack were observed as they darted over the top of it on the deck. They stayed as low as possible as they made for the coast, which they crossed two miles west of St. Pierre-en-Port. Setting a course of 340°, the two pilots headed quickly back across the Channel to make landfall on the English coast at Shoreham. They landed at 15:12, and Glen claimed the distillery destroyed, reasoning in his Combat Report that, “In view of the fierceness of the fire and the rapid hold it gained it would be impossible to save the Still and I claim this target as destroyed.”(3) He shared the victory with Valiquet. At some stage during the attacks, however, they had come under light machine gun fire from the ground near the distillery, and one of the two Spitfires sustained slight damage to its wing. The ORB makes no mention of it, but as Glen does not mention it in his comment on the operation in his logbook, it may have been Valiquet’s aircraft that sustained the damage. In any case, neither pilot was injured. Separately today, three Dutch pilots were posted to the Squadron from 57 OTU at Hawarden: 26-year-old Plt Off Leendert C. M. ‘Kees’ van Eendenburg, 25-year-old Plt Off Albert ‘Peter’ van Rood, and 26-year-old Fg Off Bram ‘Bob’ van der Stok. They were not only the first Dutch to ever serve on the Squadron, but also the first of many pilots from the Continent that would join the Squadron before the cessation of hostilities. NOTES TO TEXT: (1), (2) & (3) Combat Report for Sgt Plt Arthur A. Glen, No. 230, 9 December 1941, TNA AIR 50/18. SIDE NOTES: 1. Sgt Plt Arthur ‘Pinky’ Glen would go on to command 41 Sqn, a role he held from January to May 1944. 2. Bram van der Stok would later become one of only three men to make a ‘home run’ from the March 1944 ‘Great escape’. [Excerpt from Steve Brew’s "Blood, Sweat and Courage" (Fonthill, 2014). Sharing permitted, but no reproduction, please, without prior permission.] A cloudy day with continuous rain and good to poor visibility. At 12:20, Flt Lt Norman Ryder, was sent up to investigate an inbound raid off Whitby. Within four minutes of Raid X32 appearing on the board in 13 Group Headquarters’ Operations Room, he was airborne from Catterick, flying Spitfire Ia, N3114. He was initially sent to Redcar, with an order to sweep the area between the Redcar and Whitby, on his way to the coast. When just north of Guisborough, however, Ryder was advised the aircraft was now bombing shipping three to four miles north of Whitby, and ordered to immediately head to that location. He opened up to 4½ lb. boost and crossed the coast at Staithes at a height of just 400 feet. He could not fly much higher as the poor conditions would not allow him. The cloud cover was 9/10ths to 10/10ths at a base of around 600 feet, and visibility was very poor with fog and driving rain. When a few miles out to sea, Ryder was given a new vector of 30° to intercept the still unidentified aircraft. He soon spotted it, however, 60° to starboard, approximately three to four miles off the coast, on a course of 080° and at an estimated airspeed of 100 mph. Ryder approached the aircraft, and circled it anti-clockwise whilst he identified it as a Heinkel 111H, recognising it by the “cutaway “V” in rudder and long glass nose and fine shaping of fuselage and tail. Starboard cross [on] fuselage hardly distinguishable, but port cross very clear and looked very white with two figures behind it which could not be distinguished.” Ryder also noticed that the port engine was disabled, which was the result of anti-aircraft fire from HM minesweepers 'Lilac' and 'Walnut', accounting for its low airspeed and his ability to circle the bomber without difficulty. When the Heinkel’s crew saw Ryder, they attempted to climb away but were making slow progress owing to the damaged engine. The pilot was unable to take any other evasive action, and could therefore not avoid Ryder’s expected attack. However, they were not going to go down without a fight. Ryder needed to be quick if he was going to make an attack before the bomber disappeared into the cloud cover, and so came around behind it as fast as he could, lining himself up dead astern for a ‘No. 1 Fighting Area Attack’. As he did so, he saw red flashes emanating from the dorsal gun, but no tracers. It was misty and raining at the time, but he judged his position approximately 400 yards behind the aircraft, and made a wingspan allowance of 80 feet. Aiming his reflector gun sight on the starboard engine, he opened fire with a single six-second burst as he closed to 200 yards, with his closing speed of approximately 70 mph. Although he had expended around 800 rounds, he observed no effect of his fire on the engine. He felt this may have been the result of rain on his windscreen and the light buffeting he experienced in the bomber’s slipstream. Deciding to try again, he broke away to port to make a full 360° turn and execute a second No. 1 Attack. Just as he broke off, however, he heard two distinct bangs under his engine, though there was no noticeable effect on his aircraft. As he came around full circle, readying himself to open fire when the He111 was in his sight again, he saw “grey smoke from above and black smoke from below [the] starboard engine, and [a] momentary burst of flame from [the] region of the spinner”. Realising his first attack had indeed hit the target, he did not open fire after all, but rather continued through on an arc to port. The He111 now reacted to the damage. The starboard engine was only idling and the aircraft started to lose altitude; it was not far down to sea level. Realising the bomber was finished, Ryder discontinued his attack and positioned himself off its starboard side to watch it slowly descend towards the sea, now around 15 miles northeast of Whitby. Despite the rough sea, the bomber floated for around five minutes on its wings and fuselage, allowing Ryder to circle it a few times, intending to draw nearby ships to the crew’s aid. Before long, the Scarborough drifter Silver Line approached. Whilst circling, Ryder checked the state of his aircraft in an effort to determine the cause of the two bangs he had heard during his attack. He checked the airframe over, then the instruments, and thereby noticed his oil temperature was steadily rising. He deduced that he had probably been hit by return fire and felt the two bangs were likely the sound of a bullet entering and then exiting his engine. Realising that there was no way his aircraft would make it back to the coast in this condition, he circled a nearby trawler so they knew he was there and in difficulty. With his oil gauge now reading almost 100° Centigrade, his engine failing, and his cockpit heating up and filling with oil fumes, Ryder radioed Control to inform them of the situation. Weighing up the possibilities, he realised he would not make it to the coast, and his low altitude also meant a parachute descent was out of the question. As his altitude fell further and time was running out, it became quite clear that his only option was to ditch. When just 40 feet above the surface of the water, with seconds of flight left, he informed Control he was doing just that. Then he hit the water. He later recalled, “I stalled on the water at 65 m.p.h. with a loud crash. [The] aircraft immediately dug its nose in and came to [a] vertical position, tail up, and sank immediately. I think the whole touch down and sinking was simultaneous. My next clear recollection was realising that I was below the surface, and that everything appeared green. I undid my harness and commenced to get clear. The A/C was sinking rapidly and when almost clear my parachute caught under the sliding roof. I then got partly back into the cockpit and out again, and finally got clear and commenced to swim to the surface. The tail plane passed just in front of my face. Pressure was very great and green light had changed to dull black.” By the time Ryder broke to the surface, his lungs had almost reached bursting point and he gasped for air. Now rising and falling in a five-to-six-foot swell, he released his parachute and trod water, hoping the trawler he had circled would soon find him. He attempted to remove his flying helmet but each time he stopped paddling to remove it, he sank, so gave up. He then tried to blow more air into his Mae West, but the strain on his lungs from holding his breath, coupled with the physical effort of treading water to keep his head above the surface, made this impossible, too. He felt his sodden clothing getting heavier, but kept himself up with the assistance of his parachute, which he kept hold of throughout, though in time it, too, became waterlogged and began to sink. As he came to the peak of a roller, Ryder was relieved to see a trawler not too far away, coming in his direction. Moments later, it pulled alongside and a boat-hook was extended towards him. He was heaved on deck and taken into a cabin to reduce his exposure to the elements. He was told he was aboard the Grimsby-crewed trawler, Alaska. The crew helped him to remove his wet clothing as he was physically exhausted and vomiting sea water. They did not have any alcohol or spirit to warm him, but made him as comfortable as possible. Meanwhile, at Catterick, 41 Squadron were anxious and had difficulty finding out what was going on. It wasn’t until 14:30 that news was finally received, much to everyone’s relief, that Ryder had been picked up alive. He was landed at Hartlepool and hospitalised for three days. The five-man crew of the Heinkel was brought ashore at Scarborough by the drifter Silver Line and taken into captivity. They were identified as Gruppenkommandeur Obstlt Hans Hefele, who was a passenger on the operation, Lt Rudolf Behnisch, the pilot, Lt Georg Kempe, the Observer, Uffz Albert Weber, the Wireless Operator, and Uffz Alfred Bächle, the Mechanic. Kempe had been wounded in the head and was taken to hospital, but the remaining four men were taken to the police station, where they were fed before being collected by the military. At Burniston Barracks, they revealed they were on an armed reconnaissance flight in He111H-3, 1H+AC, of Lübeck-Blankensee based Stab II/KG26. As this was the first time a Spitfire had ditched in the sea – and the pilot had survived to tell the tale – both the Air Ministry and Supermarine were interested in the circumstances of Ryder’s escape. He was asked to make recommendations and his detailed report provided invaluable information for training pilots in what to do when ditching; it is understood he spent some time lecturing other pilots on surviving ditching in the sea. Some of these recommendations are included in his Combat Reports, and suggest that a pilot finding himself in such a situation should: • Tighten straps and inflate “Mae West”, • Open hood and possibly door. • Close radiator flaps and pancake at 70 m.p.h. • Aircraft immediately tucks its nose in (with sea running) and assumes a vertical position, tail up, and sinks. • Release Sutton harness and parachute and evacuate, push away hard to clear tail plane. Whilst this was 41 Squadron’s first loss of an aircraft in action during the War, the major newspapers reported it was also the first British home based fighter to be shot down by an enemy aircraft, for fifty German aircraft already shot down by the RAF. Additionally, the 13 Group ORB records that Ryder’s He111 was the 27th enemy aircraft shot down by the Group since September 1939. Ryder was awarded the Distinguished Flying Cross on 19 April for the ‘coolness and courage’ he showed today, thereby receiving the first decoration to be bestowed upon a 41 Squadron pilot during World War II, and the first DFC awarded the unit since 1919. The citation reads, “During April this officer was ordered to investigate an enemy raid at sea and took off alone in bad visibility and low cloud. He sighted an enemy aircraft and, observing that its port engine was out of action, he promptly attacked the starboard engine and after disabling it with one burst of fire the aircraft fell into the sea. Afterwards Flight Lieutenant Ryder found that his own aircraft was losing power and he was forced to come down on the sea, whereupon his aircraft immediately dived. When at a considerable depth he managed, with great difficulty, to extricate himself from the cockpit and was then picked up by a nearby trawler. His accurate flying made the interception a success, and his coolness and courage materially contributed to his own rescue and the collection of much valuable information. He set a splendid example of courage and discipline to his squadron.” [Text: Excerpts from Steve Brew's book "Blood, Sweat and Courage" (Fonthill, 2014; Images: 1. A portrait of Flt Lt E. Norman Ryder DFC, drawn by Captain Cuthbert Orde on 4 January 1941. Crown copyright expired, 2. Flt Lt Norman Ryder DFC, late Nov 1940, snip from IWM Image CH 001871, 3. Ryder was flying Spitfire Ia, N3114, EB-J, when he claimed a Heinkel He111 on 3 April 1940, but was shot down by return fire and ditched in the North Sea. This profile commissioned specifically for "Blood, Sweat and Courage" © Gaëtan Marie] 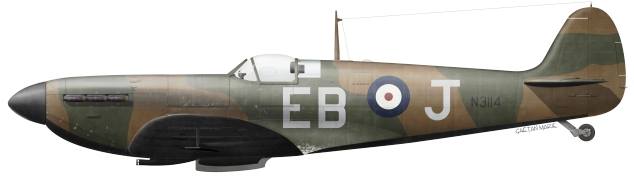
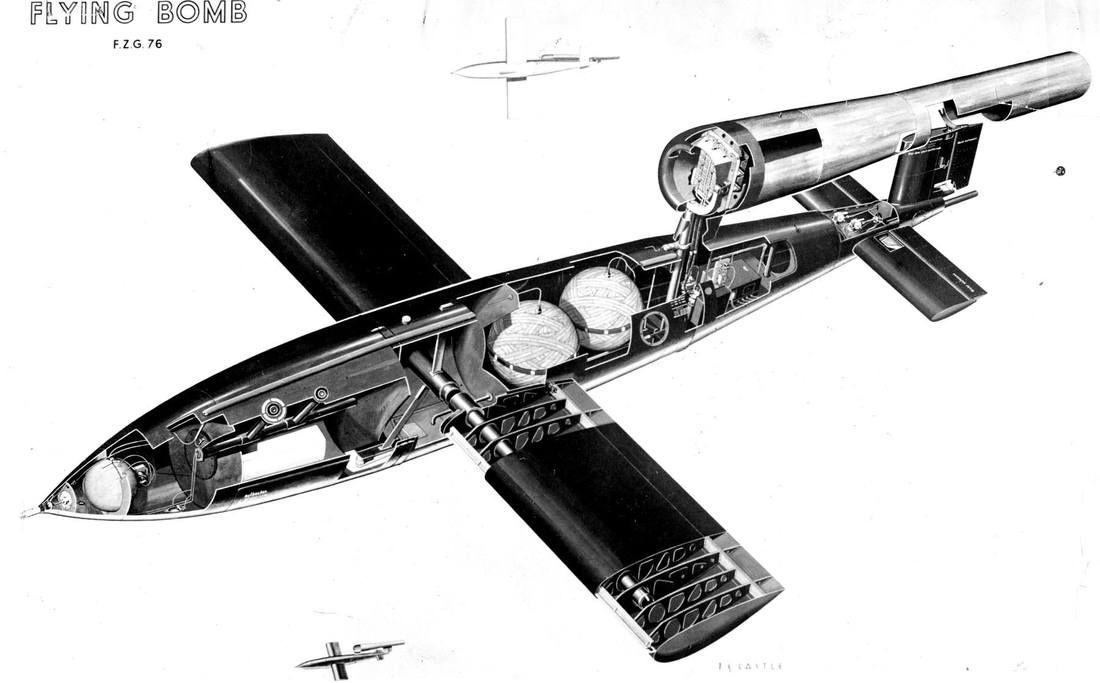
'NOBALL' TARGETS, 1943-1944 Tangmere's Spitfire XII Wing participated in a single Ramrod on 5 December 1943, which constituted the first ever Noball target not only by the Wing but also by Allied forces in general. ‘Noball’ was a code-name for targets related to the V1 flying bomb. Allied intelligence of German rocket-propelled technology had been building for some months and significant data had been gathered by agents in Germany, Denmark and France, including photographs and sketches. By late October 1943, sufficient concern had been raised to justify a decision to have RAF Photographic Reconnaissance squadrons photograph all of northern France. During the following month, the first photographs were obtained of ‘ski ramps’ and of ‘midget aircraft’ on one such ramp. By the end of November, 72 ski ramps had been photographed and, as a result, the British-American Combined Chiefs of Staff gave the order to launch “Crossbow Operations against Ski Sites” on 2 December. The first attacks were planned for 5 December at St. Josse-au-Bois in the Pas-de-Calais and at Ligescourt in Picardie, which were the targets that the Spitfire XII Wing supported today. The Wing would support another eight such attacks during December 1943 (totalling nine out of 13 operations by the Wing that month), twenty-one in January 1944 (constituting every operation by the Wing that month) and another eight attacks during February (80% of the Wing’s operations). By early 1944, the damage wrought by Allied attacks on Noball sites had compelled the Germans to move to mobile launch ramps, the first of which was complete by 25 February. By this time, however, the Spitfire XII Wing had been split up and although 41 Squadron supported another eleven attacks on Noball targets during March and April 1944, the unit was withdrawn from Ramrod operations altogether from 28 April. They were then deployed instead on ground attack operations in preparation for the launch of Operation Overlord. It should be emphasised that, all this time, not a single V1 was launched against the United Kingdom and all the attacks that 41 Squadron, and indeed the Spitfire XII Wing, were involved in during late 1943 and early 1944 were of a purely precautionary and preventative nature. However, whilst 41 Squadron was relieved of operations against Noball sites at the end of April 1944, it would only be a brief respite; less than two months later the Squadron was called upon again against the V1 – this time, however, in a defensive role against aerial targets rather than stationary ground targets. [Excerpt from my "Blood, Sweat and Valour" (Fonthill, 2012). Sharing permitted, but no reproduction without prior permission, please.] 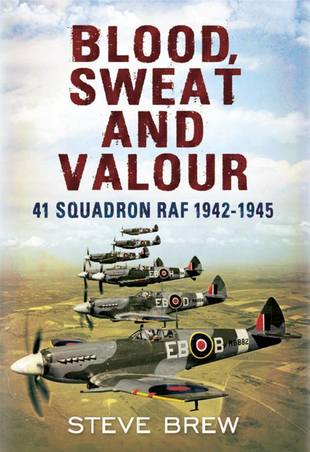 The following information can be found at http://australiansatwarfilmarchive.unsw.edu.au/archive/1627-eric-gray
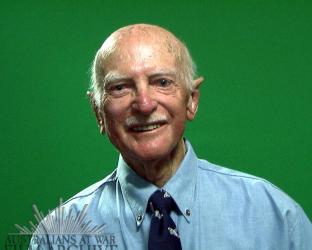
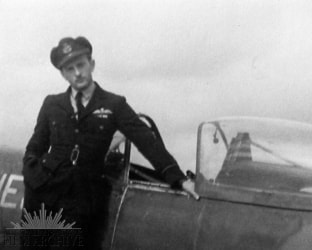
Australians at War Film Archive Transcript of Interview Eric Gray Archive number:1627 Preferred name:Ricky Date interviewed: 10 March, 2004 Copyright UNSW Canberra 2018 Transcription Tape 01 01:00:38:00 We are starting now, so can you just give me a summary of your life? Yes well I was born in Brisbane and brought up in a small country town of Gore, and moved through as my father moved through from butchering business to butchering business and we eventually finished up in Toowoomba. My entry into 01:01:00:00 Toowoomba was by horse. I rode a horse from Toowoomba by sulky [light buggy], mare, from Toowoomba to? I'm sorry, from Allora to Toowoomba that about 30 odd miles, 35 miles. I was about 10 years of age then. And then I worked after school I was in a printing office and later on as war broke out and I got on reserve for RAAF [Royal Australian Air Force] aircrew in 1940 and I was called up in 01:01:30:00 1941, July 1941. And I spent the, after getting my wings in Australia on Wirraways I was transferred to, took a posting I should say to England and did some refresher flying over there and then joined a RAF [Royal Air Force] Spitfire Squadron, 41 Squadron. And of course I was fortunate to see the war through from when I got over there to 01:02:00:00 end of 45 and I was discharged from, got my discharge from or repat discharge I should say from the squadron to Britain prior to coming back to Australia. So I arrived back in Australia in 1946. 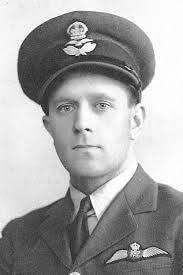 Sqn Ldr Hood Sqn Ldr Hood This article originally appeared on the BBC's World War Two People's War website.
The events leading to Squadron Leader HRL Hood DFC being officially listed as Missing are complex; contemporary records are now incomplete, contradictory and vague. By assembling the facts available, supplemented by eye-witness accounts and tangible relics, a clearer picture emerges which could possibly explain Squadron Leader Hoods true fate.At 1500 hrs on Thursday, 5 September 1940, Squadron Leader Hood led 12 Spitfires of 41 Squadron from Hornchurch with orders to patrol Maidstone at 15,000ft. Hood flew as Blue 1 of 'B' Flight, rearguard cover being provided by 'A' Flight, led by Flight Lieutenant Norman Ryder. The scramble was a hurried affair and, as the squadron climbed away from Hornchurch, a large enemy formation was encountered flying up the Thames Estuary towards London: He111s, Do17s and Ju88s escorted by Me109s. Other Fighter Command squadrons had been vectored to intercept this raid; the Hurricanes of North Weald's 249 Squadron, Debden's 17 and 73 Squadrons, Northolt's 303 Squadron and Stapleford's 46 Squadron. 41 Squadron Pilot Officer Wally Wallens recalls: "As usual I was flying Number 2 on 'Robin' Hood leading 'B' Flight and, being unable to gain height advantage and position in time, 'Robin' put us in line-astern and open echelon port and attacked head-on, a desperate manoeuvre that could age one very prematurely. Within seconds all hell broke loose and, as the action developed, 'B' Flight was overwhelmingly attacked by the 109s. "Only four Spitfires from 41 Squadron failed to return this engagement. Pilot Officer Tony Lovell had parachuted out of his burning aircraft over South Benfleet and returned to Hornchurch. Pilot Officer Wallens had force-landed, near Orsett, with a cannon shell through his leg and had been taken to hospital. One pilot was confirmed killed in action. His body was identified as that of Flight Lieutenant Webster DFC. Squadron Leader Hood was officially recorded as 'Missing'." Reg Lovett of 73 Squadron Another casualty of this interception and relevant to our investigation was Flight Lieutenant Reg Lovett DFC of 73 Squadron. That unit's Intelligence Report states that: "A and B flights took off from Castle Camps at 14.55 hrs with orders to orbit North of Gravesend. At 1510 approx. enemy formation sighted about 1 mile to south being engaged by A/A at 19,000ft. E/A flying westwards in 3 vics, in line astern. A Flight led by F/Lt Lovett DFC attacked the rearmost formation. Leader commenced quarter attack, but as E/A travelling very fast it developed into astern attack at 350 yards. Leader experienced considerable cross fire and was hit by MG fire on the port side. Closed to 300 yards, but hit on starboard leading edge by cannon shell, and in breaking away a Spitfire came upwards almost vertically and they collided. Leader baled out and landed near Rochford, uninjured after a delayed drop." Throughout this engagement, numerous aircraft fell to the earth below, observed by many military, police and ARP personnel, in addition to the general public. The majority of aircraft fell in the Nevendon area of Essex, adjacent to the A127, the main arterial road between London and Southend-on-Sea. The ARP telephone messages recorded: "At 15.30 approx. at Nevendon 0.25 mile SE Nevendon Hall. Machine Wrecked. Spitfire. Pilot baled out unhurt. "At 15.30 approx. Wickford. Fuselage, part body and one wing fell Cranfield Park Road 400 yards SW Tye Corner. Wing bears marking K, believed British." Further details were recorded in the War Diaries of local military units. The aircraft losses noted in the ARP records were also present in these diaries, but the following additional information was noted: "312 Searchlight Battery RA: A wing apparently belonging to a British fighter was recovered at M177010. One British pilot picked up dead on the Arterial Road at M1710. "37th AA Brigade RA: Spitfire crashed in Nevendon M180101. The pilots parachute became entangled with the plane and he was killed." An eyewitness describes the eventsJohn Watson was working at The Old Cricketers garage in Nevendon: "I could see and hear aircraft very high. Something fell into the centre of the junction and Mr Ryder, the proprietor of the shop on the corner, ran out and picked up what turned out to be a 303 bullet. As I looked up I saw an aircraft coming down. Part of the wing of this aircraft was missing and it was accompanied by a Spitfire wing. I was certain that I saw a complete Spitfire with its wing cut off, both tumbling down together. The wing came down in the direction of Wickford; the aircraft I believe may be the one which came down about 75 yards North of the present junction of Courtaulds Road and Archers Fields, on land now belonging to Essex Water and part of the treatment works. I could see a parachute coming down in the direction of North Benfleet. "As all this was going on, my attention was drawn to a Messerschmitt 109 which was also coming down in a perfect tail spin and on fire. I looked back just in time to see the British aircraft crash down nearby. As soon as I finished work, I was able to visit the crash site of the aircraft. The Hurricane had been badly damaged on hitting the ground and I was not able to get too close." For many years, various publications suggested that Terry Webster and Robin Hood had collided, but it appears more likely, given the evidence from the 73 Squadron report, that Webster actually collided with Flight Lieutenant Lovett's Hurricane. Therefore, it seems reasonable to suggest that the Hurricane which crashed a quarter of a mile South East of Nevendon Hall/Archers Fields was the aircraft vacated by the latter. This is corroborated by items recovered by Roland Wilson, on whose land the aircraft crashed. A Hurricane radio mast and Merlin II engine limitations plate were removed from the wreckage before the area was cordoned off by the authorities. The fragmentary remains of the aircraft reported on the Northern side of the arterial road were found by numerous local people. Walter Smith found the seat of the Spitfire, used by the family as a makeshift chair for many years. Roland Wilson encountered the entire tail section of the Spitfire and, daunted by the size of his souvenir, satisfied himself by removing the rudder mass balance weight and stub aerial for his collection. More importantly, some weeks later, Roland discovered an unopened parachute pack in open fields North of where he had found the Spitfire tail section. The parachute was marked 'WEBSTER'. Roland handed over the parachute to Nevendon Police, who congratulated him for his honesty. This event was recorded briefly within the Brentwood and Southend-on-Sea Police diary: "17.35 30.9.40. Nevendon. Parachute and engine of a Spitfire which crashed 5.9.40 found in a field at Nevendon." Youngsters find Spitfire wreckage a day or so after 5 September, thirteen year old Sam Armfield and his younger sister, Brenda, were on their way through scrubland, known locally as 'The Police Bushes' on account of being opposite the A127 Police Houses. The youngsters were en-route to fish at a pond. In the wasteland they were astonished to encounter the virtually intact wreckage of a Spitfire which was lying on the surface and hidden by the tall bushes. The entire fuselage forward of the control panel was missing, but there was no other indication of battle damage. Sam recalls: "The Spitfire obviously couldn't be seen from the main road, otherwise soldiers or Home Guard would have been guarding the aircraft. I don't recall any signs of bullet or cannon holes and no blood or anything in the cockpit - we would have looked for that sort of thing. The tail wheel was clear of the ground and we all commented on what a good wheelbarrow wheel it would make. None of us could remove it. We all took turns to climb in the cockpit and pretend to fly it, but we were all reluctant to press the gun firing button on the control column. We were able to remove the gun inspection covers and discovered that all the ammunition had been exhausted and the webbing belts were slightly frayed from passing through the guns." Brenda Armfield recalls that she discovered the severed port wing on the other side of the bushes, some eight feet away from the main wreckage. The wing had separated at the last inboard gun position and the Browning machine gun was exposed. Brenda used the small screwdriver from her sewing kit to take off the ammunition feed chute, which was already loose. The boys were jealous of her prize and made unsuccessful attempts to remove the gun itself. Every evening after school the youngsters would rush home to play on the aircraft and make further attempts to remove various souvenirs. Although they told no adults about 'their' Spitfire, after about a week they arrived to find that the wreck had been removed. The engine of this aircraft appears to have fallen further West of the main crash location, near Great Wasketts Farm. Apparently, the Merlin was shattered and many fragments lay scattered about the impact spot. The engine was guarded by a member of the LDV, although Sam Armfield managed to obtain some souvenirs which have since been identified as being of Rolls-Royce Merlin origin. Although the eye-witnesses have identified this aircraft as a Spitfire, the lack of battle damage confirms the fact that it could not have been Lovett's Hurricane, which had been badly damaged by the enemy - 73 Squadron Intelligence Report refers. Only one Spitfire remains unaccounted for: Squadron Leader Hood's P9428 EB - R. This may well have been his aircraft. It is quite possible that the Spitfire discovered by Sam Armfield was that referred to in the War Diary of the 37th AA Brigade RA, although it is unclear why the wreckage was not discovered by the authorities earlier. The report states that the pilot's parachute became entangled with the plane prior to his death. However, there appears to be no firm evidence to confirm the recovery of the body of the pilot from this particular aircraft, or its subsequent burial. It is understood from the Pitsea undertaker, Mr Green (who was responsible that day for the recovery of a German Casualty, Hauptmann Fritz Ultsch) that the bodies of all airmen were initially taken to local mortuaries before being collected en-masse by Frank Rivett and Sons of Hornchurch. The bodies were then transferred to RAF Hornchurch for distribution and burial. The records of Frank Rivett and Sons were apparently destroyed during the Blitz. The Luftwaffe cemetery The absence of any records relating to local undertakers makes positive identification of the final resting place of this pilot difficult to establish. Allied airmen were generally buried in the graveyard at St Andrews Church, Hornchurch, unless it was requested otherwise by the family of the deceased. Luftwaffe casualties were interred at Becontree Cemetery and it is here that an interesting anomaly has been noted. Within the Barking and Dagenham Burial Register, Entry No. 5176 records the burial of a Walter Heatz/Heatry (Register no. 5/09/11) on 12 September 1940 in grave B1:684 - the day after the burial of Hauptmann Fritz Ultsch. The GWGC have confirmed that they have no record of any relevant casualty and, consequently, the body has never been transferred to Cannock Chase. Interestingly, the original entry 5176 in the Burial Register has been altered at some time in the past and the name of Walter Heatz has been crossed out and the name Walter Klotz added in pencil. The name Walter Heatz then reappears lower down in the register under Entry No. 5206, on 26 October 1940, where the name unknown has been crossed out and W. Heatz added, also being buried in Grave B1:684. Given that some major errors were obviously made at this time, further research is currently being undertaken to examine the possibility that this grave may actually be the final resting place of Squadron Leader Hilary Richard Lionel 'Robin' Hood DFC. In conclusion, it is believed that whilst attacking the bombers head-on, B Flight of 41 Squadron were bounced by JG54. The exact cause of Squadron Leader Hood's loss remains unconfirmed, although there is one combat claim by Timmerman of 1/JG54 which may possibly relate to this casualty. Hood appears to have baled out, but his parachute became entangled with his aircraft with fatal consequences. Spitfire P9428 then tumbled down, engine-less and minus its port wing, landing near the arterial road in Nevendon. Whatever injuries Squadron Leader Hood sustained whilst baling out will never be know, but it must be presumed that they were such that personal identification was not possible. As it has recently been accepted that Flight Lieutenant Rushmer lies in the 'unknown' grave at Staplehurst, there are no other unidentified RAF casualties with this date of death. Could it be, therefore, that at some point between collection of the body and its eventual burial, a mistake has been made leading to Hood's burial as a non-existent German airman? I doubt we will ever know, but from the evidence available, and fantastic as this theory sounds, it has to be considered a very distinct possibility. 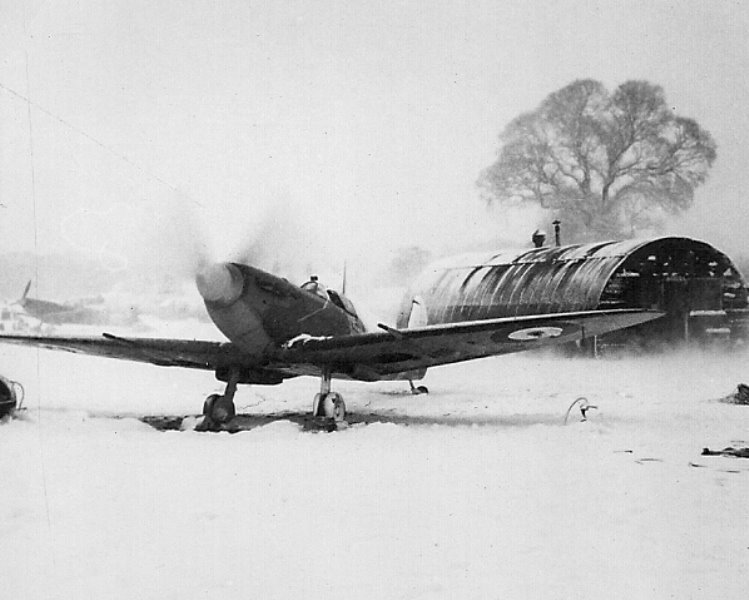 THE OTHER ENEMY
January 1940 The Luftwaffe was not the only enemy as the so-called ‘Phoney War’ continued into the new year; the weather also wrought havoc this winter in England’s northeast. The first serious snows had fallen in November 1939, which made flying difficult. After one particularly heavy dumping, snow ploughs were brought out and every available hand at the station was issued a spade or similar tool and put to work clearing a usable landing strip. After much sweat and effort, a single runway was cleared, which was lined with large mounds of shovelled snow. It was intersected at various points with entry and exit paths leading to the perimeter track and dispersals areas. It was a bitterly cold winter throughout the United Kingdom and at the beginning of January 1940 the country experienced its coldest conditions since 1894, the thermometer falling below 0°F in many places. The Thames froze over at Kingston, lochs froze up in Scotland, and ice covered stretches of the Humber, Mersey and Severn. The southeast suffered its heaviest snowfall for forty years. On the Continent, the icy conditions stretched from Scandinavia to Italy. France reported it was their coldest winter since 1917 and several people died of the cold in Italy, the temperature falling in Milan in late January 1940 to 14°F. Even on the other side of the Atlantic, Washington DC bemoaned the fall of 15 inches of snow, whilst Richmond, Virginia, experienced the heaviest snowfall in over 30 years. RAF Catterick, too, was hit with heavy snows in late January. Seven inches were dumped on the aerodrome on the 22nd of the month, and more snowfall followed on the 26th and 27th. As a result, the airfield was closed on 27 January, and all operations were cancelled until the end of the month. Plt Off ‘Wally’ Wallens recalled the difficulties facing him and his fellow pilots in the snow; “It was a very dodgy operation, taking off and landing in such conditions, particularly with the Spitfires having such restricted visibility when taxying [sic], ploughing about in clouds of snow, pilots not knowing whether they were on or off the runway. […] Landing on packed snow in bright sunlight could be very tricky as, like landing an amphibian on still, glassy water, one’s judgement of height could be so affected that one might hold off much too high or virtually fly into the deck with a resounding thump.”(1) On 29 January, two runways were cleared for emergency flying by 400 men from the Catterick Army Camp and, on 1 February, 219 Squadron’s Blenheims were permitted to fly again; permission for 41 Squadron’s Spitfires followed a day later. The weather did not, however, improve a great deal into the first weeks of February and flying was kept to a minimum. Flt Sgt ‘Shippy’ Shipman recalled the monotony of this lack of activity, “There were many long hours of waiting and thinking. One read books and played cards until one was sick of both. Boredom was the immediate enemy, and sleep was often the result. We had one young pilot officer who became so irritable, angry and tensed up that he did nothing but pace up and down by himself; he was almost a nervous wreck. Another pilot went down with an ulcer.”(2) [Excerpt from my “Blood, Sweat and Courage” (Fonthill, 2014). Sharing permitted, but no reproduction without prior permission. Quotes: (1) "Flying Made My Arms Ache"; Sqn Ldr R. W. ‘Wally’ Wallens, DFC, retd., 1990, Self Publishing Association Ltd; (2) "One of ‘The Few’; The Memoirs of Wing Commander Ted ‘Shippy’ Shipman AFC", John Shipman, 2008, Pen & Sword. Image © Swanwick family.] The full extent of the activities conducted by 41(R) TES cannot be shared online, however you can get a sense of the scope and complexity involved in this recent publication by David Gledhill and David Lewis. 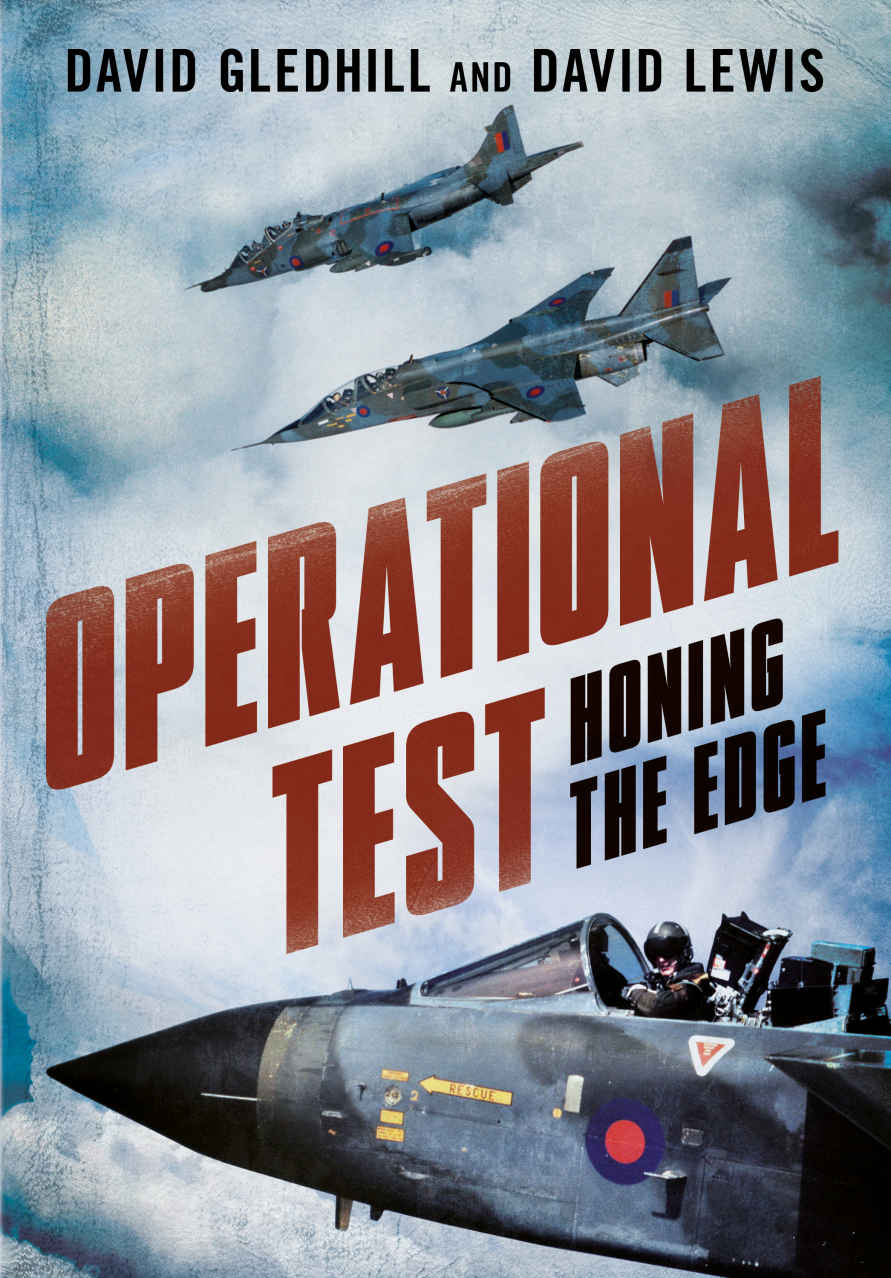 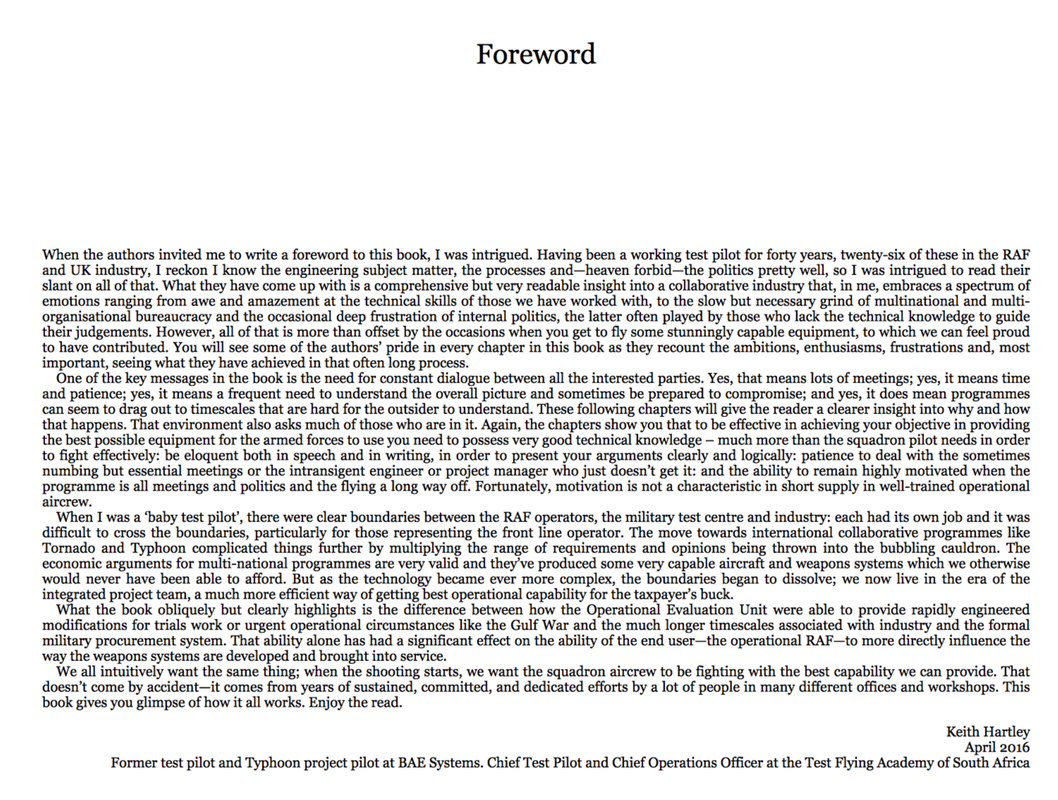 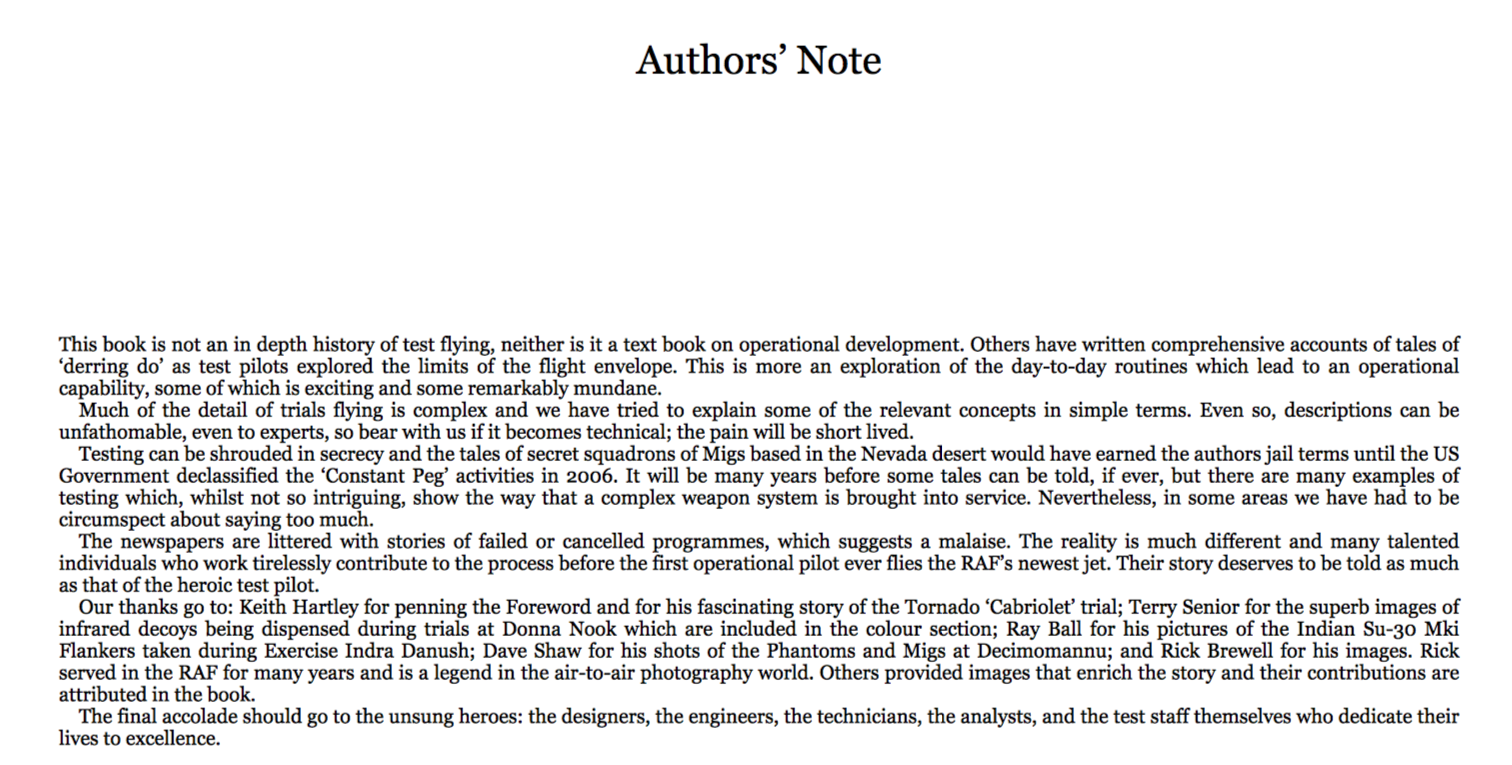
The Squadron hold very little information covering the years that it operated the Bloodhound Missile (1965-1970). Fortunately the Bloodhound Missile Preservation Group (BMPG) have an excellent resource of information on their website and YouTube channel. Read more below:
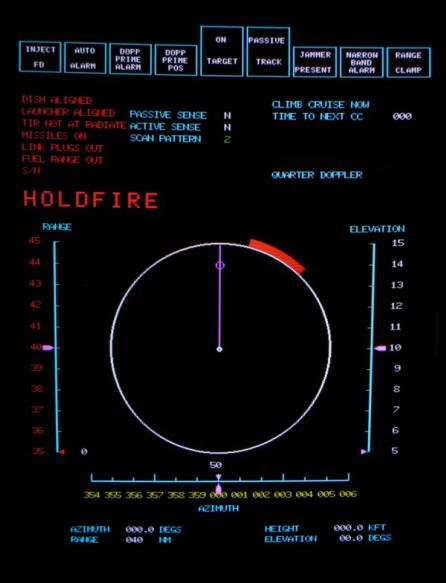
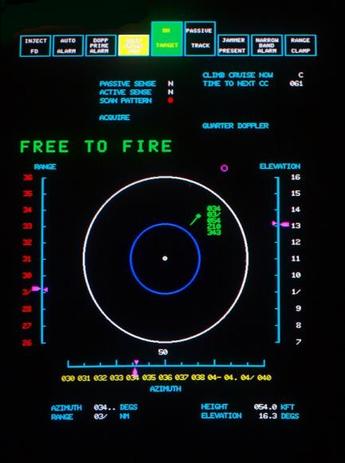
The Bloodhound MKII missile system, as operated by 41 Squadron, was a key part of the integrated UK air defences during the Cold War, a wholly British designed defensive weapon to counter nuclear armed, high flying bombers at long range. Bloodhound MKII became operational with the RAF in 1964 and continued to be improved as new technology became available with its operational role continually enhanced to include the countering of low level air strikes. The missile system was withdrawn from RAF service in 1991, at the end of the Cold War. You can learn more about how the system worked through the following reports
|
Photo Credit:
Rich Cooper/COAP Association BlogUpdates and news direct from the Committee Archives
August 2022
Categories
All
|
|
Follow or Contact the Association:

|
© COPYRIGHT 2016. ALL RIGHTS RESERVED.
|


 RSS Feed